Wiring up the new house

I’ve never done real, actual wire fishing before. I’ve pulled stuff in a straight line through walls, I’ve done drop ceilings and such, but this was a new challenge for me – 16 ports to start, 4 rooms, plus the attic for 2 Unifi access points, through a finished basement.

So naturally the first thing I did was pull out my studfinder and poke a hole in the wall of my computer room. When fishing wire there are a couple things you don’t want to find: Insulation, PVC pipe, water damage, bug damage… So go figure I find the first 2 on the first hole.
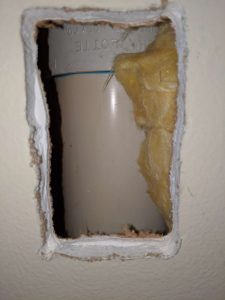
It’s like, dead-on, too.

Luckily I now have a landmark. So I took some measurements upstairs and went downstairs, plotted out my spot on the ceiling, and made a big ol hole, which revealed the PVC pipe. Score. Took my spade bit and drilled a hole some inches to the right, then went and got my fishtape.
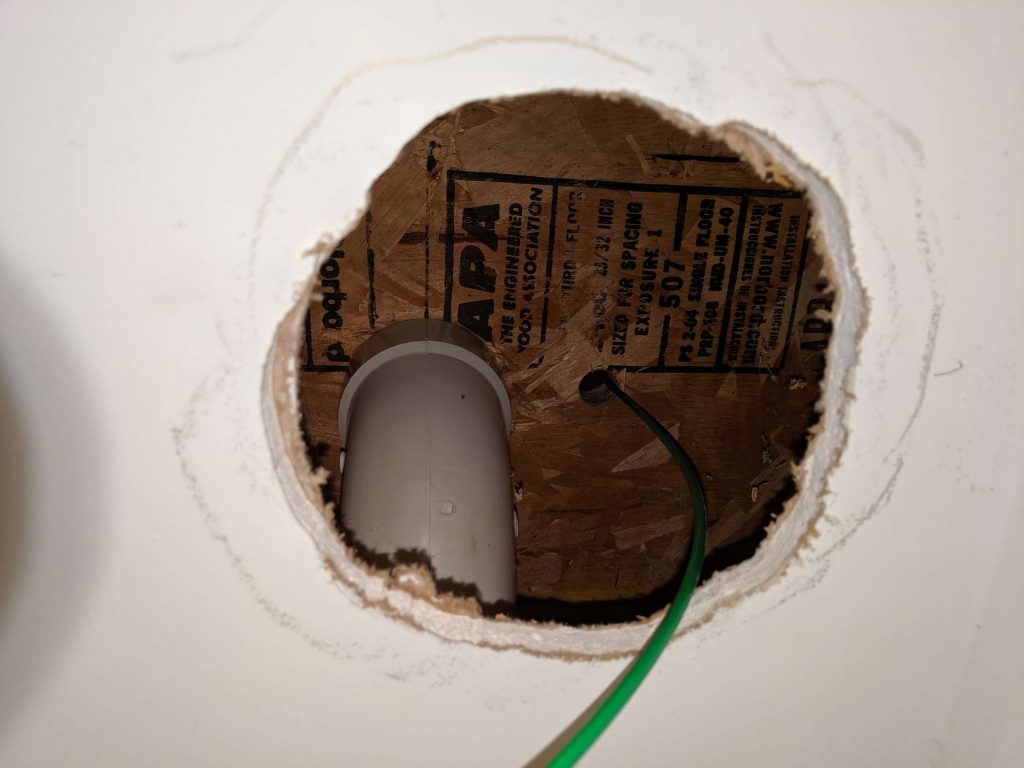
It’s not a perfect circle, but the access panels I got cover it beautifully.

The joists in the house run perpendicular to the ventilation and the support beam that runs the length of it. From the furnace room I could see there was a 12″ x 12″ void space that runs the entire length of the house that’s also perpendicular to the joists. That’s where I planned to run the cable, since at most it was only a couple right-angle turns and I’d be right there.

Next up I started running the cable down into the hole I’ve made.
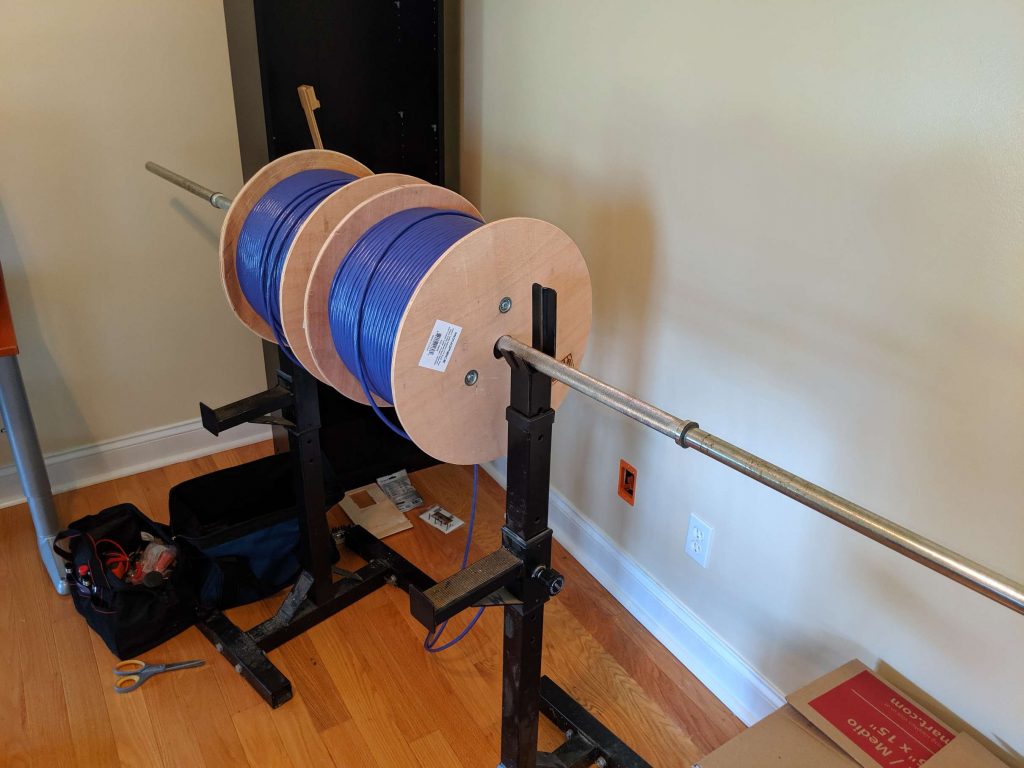
I got these 2 spools of Monoprice Cat6a and threw them on my weight rack. They hold the weight while allowing the spools to spin freely, plus now I’m actually getting some use out of the thing.

I pulled a good 20 feet down through the hole, then immediately went over to the next room and cut another ceiling-hole. Threw the fishtape over and pulled it, and I’m now sitting right at the void space. Perfect.
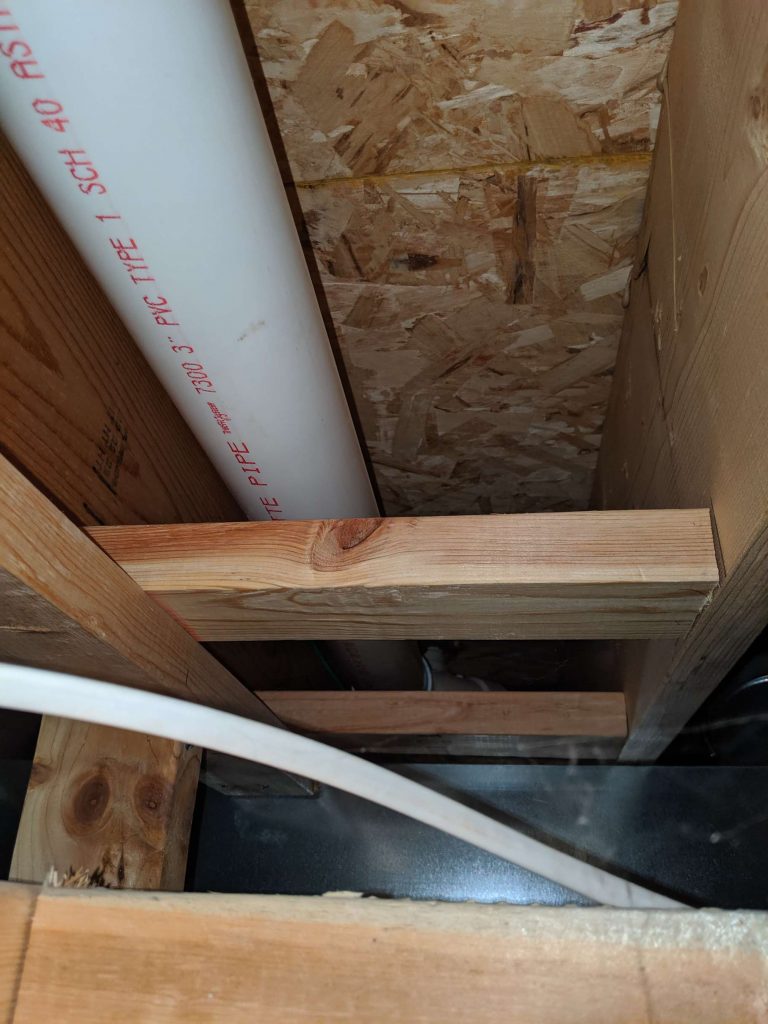
From the second hole, looking over toward where the PVC goes into the ceiling. About 8 feet.

The void space is fun because it’s encased in a blocked-out area of the finished basement. That means a lot of horizontal 2×4’s, and I found that fishtape is a lot more useful when gravity is your friend. So I went out and got some fiberglass fish poles. Less flex, more ability to get them over the 2×4’s.

I made a giant hole in the middle of the ceiling. Hooray. If there was a point before where I could turn back, I’ve surely blown straight past it now.

I threw some Ideal fish line into the hole, threw a hook on the end of my pole, put it down to the end and swished it around. I still can’t believe this worked. It’s about a 20 foot run.
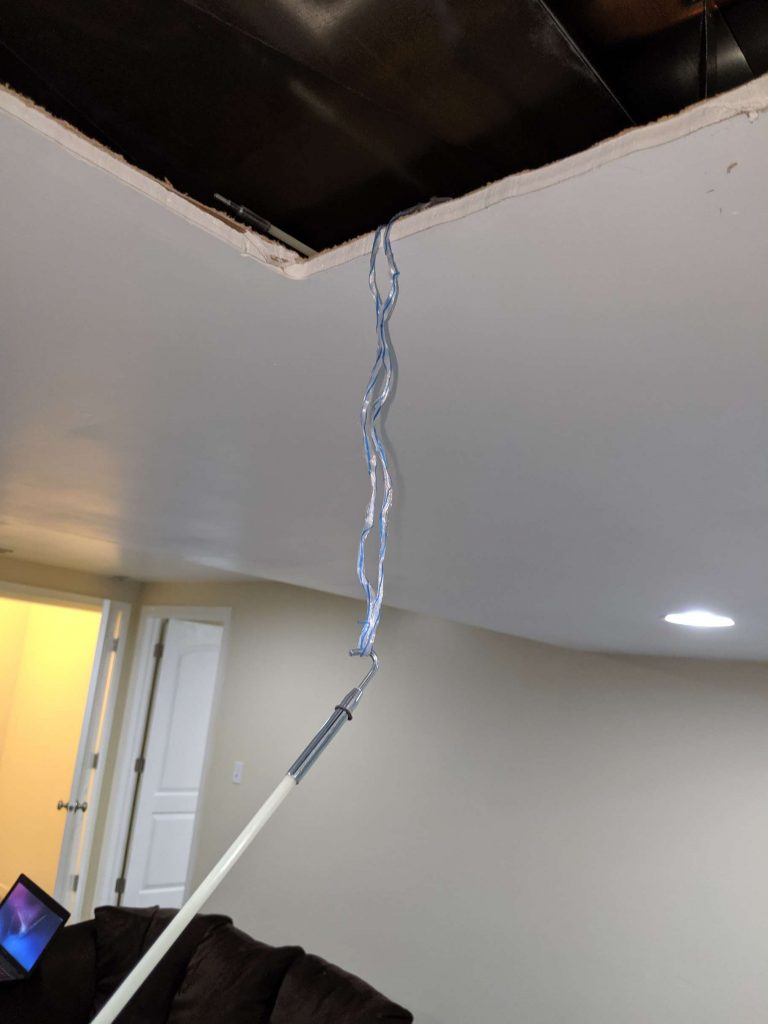
So using this I created a fish guide. I was going to have to do a couple more pulls and I didn’t want to have to fish it again.
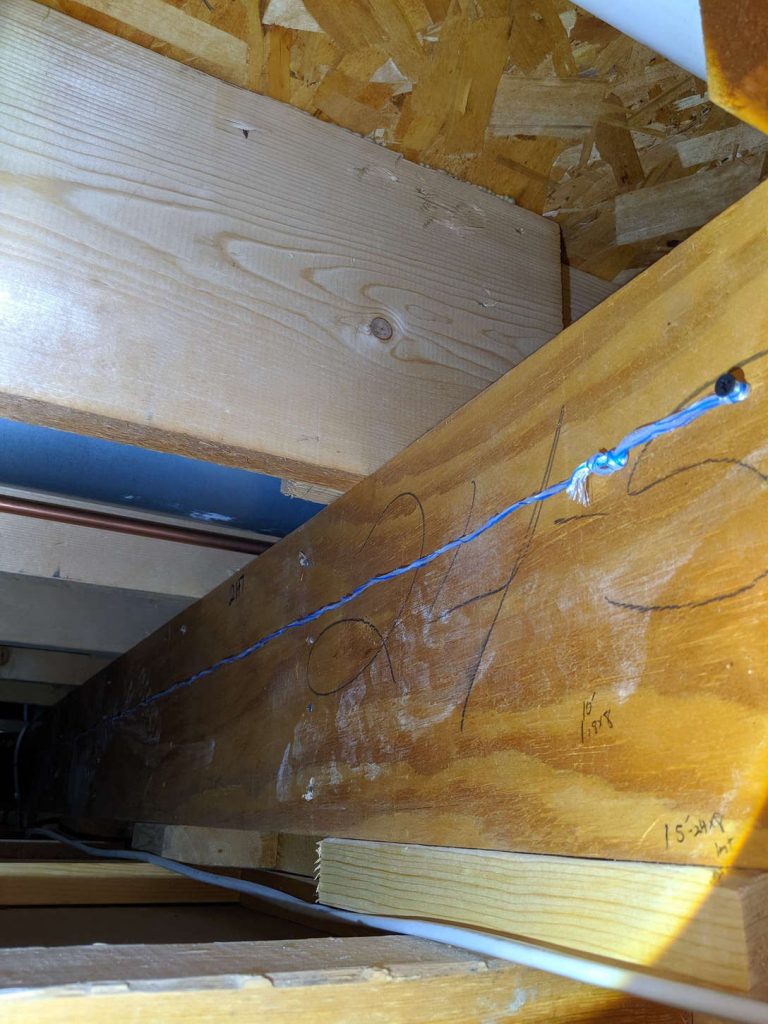
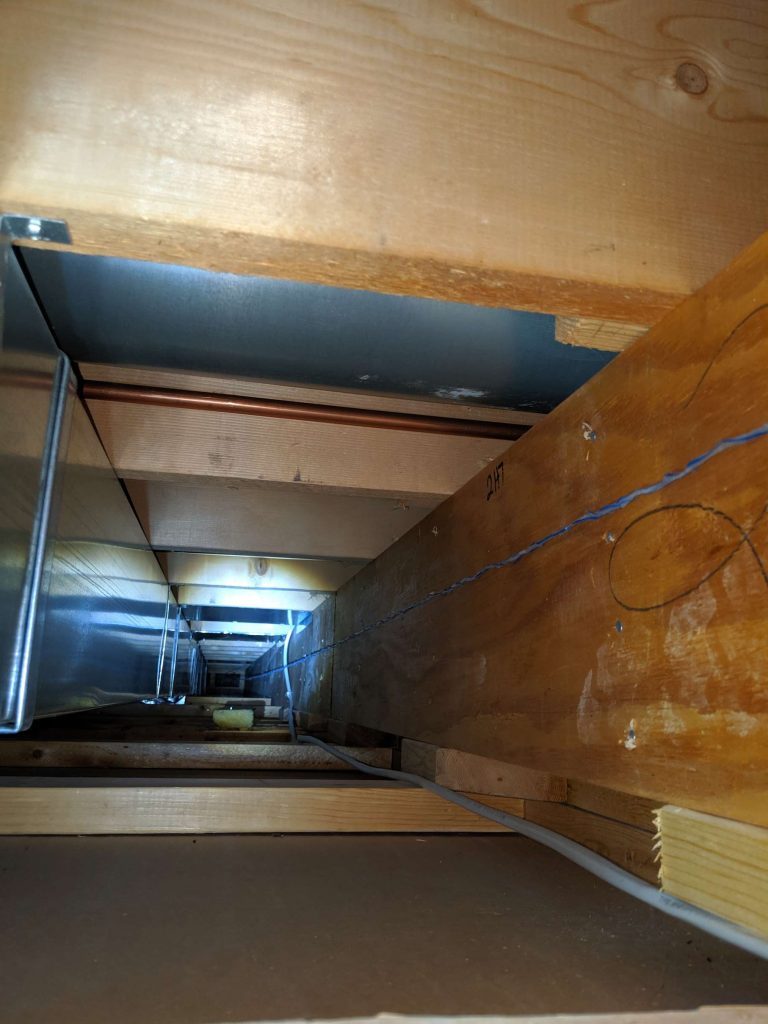
Success

From down here it’s just a quick turn, up and over the ventilation to the server room. Cue another hole in the ceiling, one I care much less about the shape of because it’s going to get a custom shroud eventually.
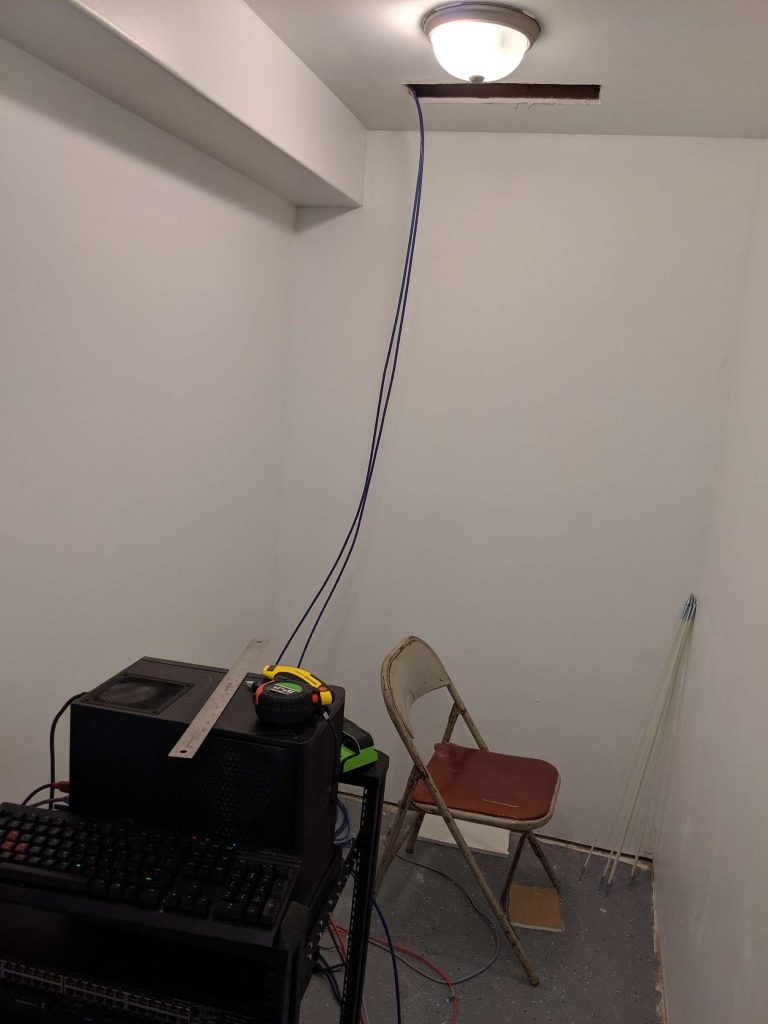
This whole process sucked. 14 more cables to go.

To end out the day, I pulled another 2 from that room, and 4 more from the bedroom next to it since it’s right above hole number 2. I didn’t have to cut any additional drywall for that one so it’s a huge plus.

Next day I got the wallmount rack set up…
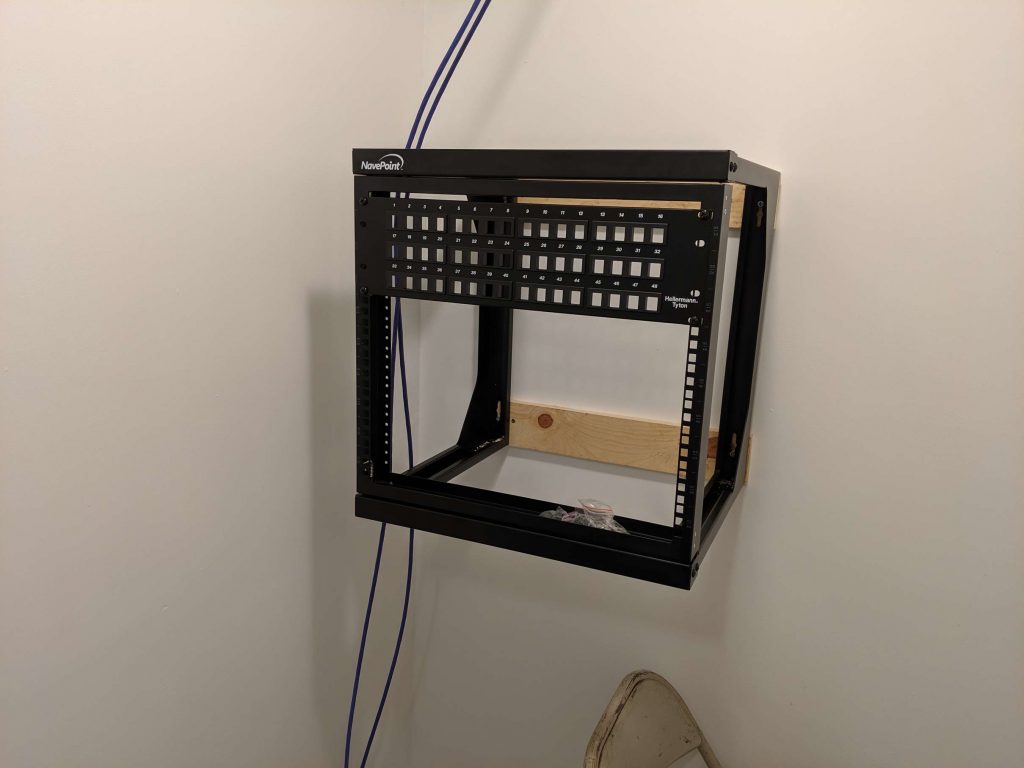

…and the first 4 ports wired.
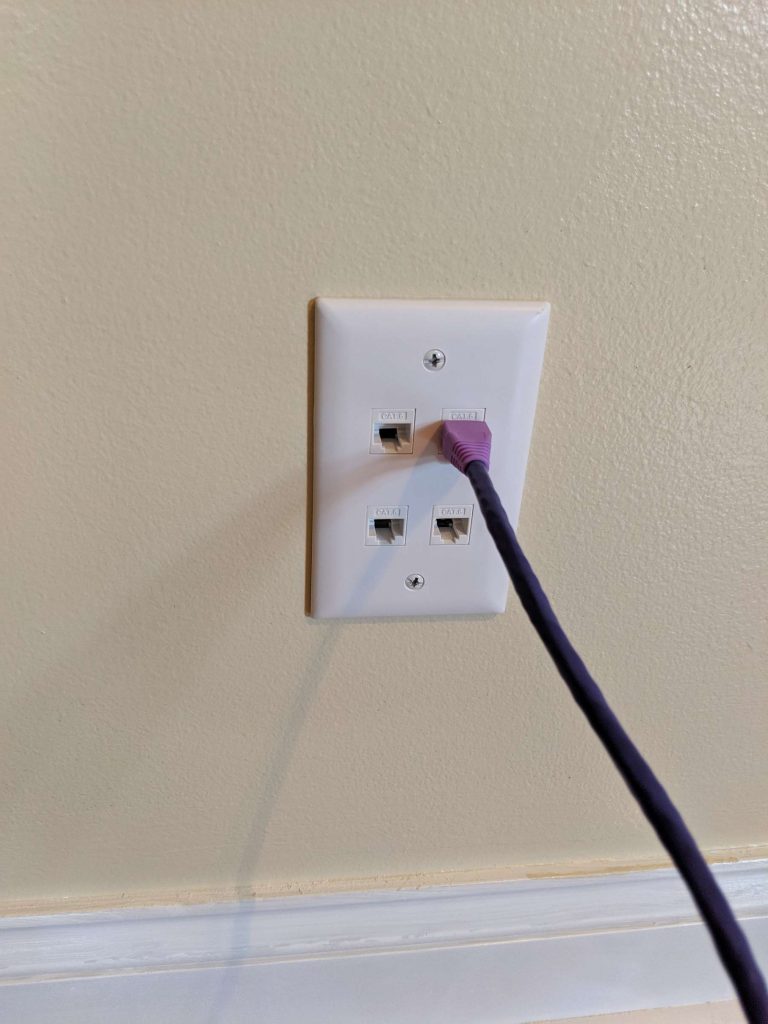
Stellar. Really chugging along now.

For the next bit, I figured some torture would be great. I’m terribly afraid of heights. The only access to the attic is in my fairly tall garage. I have a ladder, but it’s about 2 feet short to make a comfortable ascent. So why not get the Unifi AP cables run.

I don’t have any pictures of this since I forgot my phone before going up there, but wading through 2 feet of blow-in insulation is now my idea of the worst way to spend an afternoon.

Fortunately, this run is from the only unfinished room in the basement, and my house is a ranch, so it was a fairly easy pull to go straight up using the radon exhause pipe as a landmark. 8 inches to the north from the basement, 8 inches to the north from the attic, and bam, straight shot. Pulled the run, terminated, got the fuck outta the attic, line tested with my laptop, and I’m a happy camper.
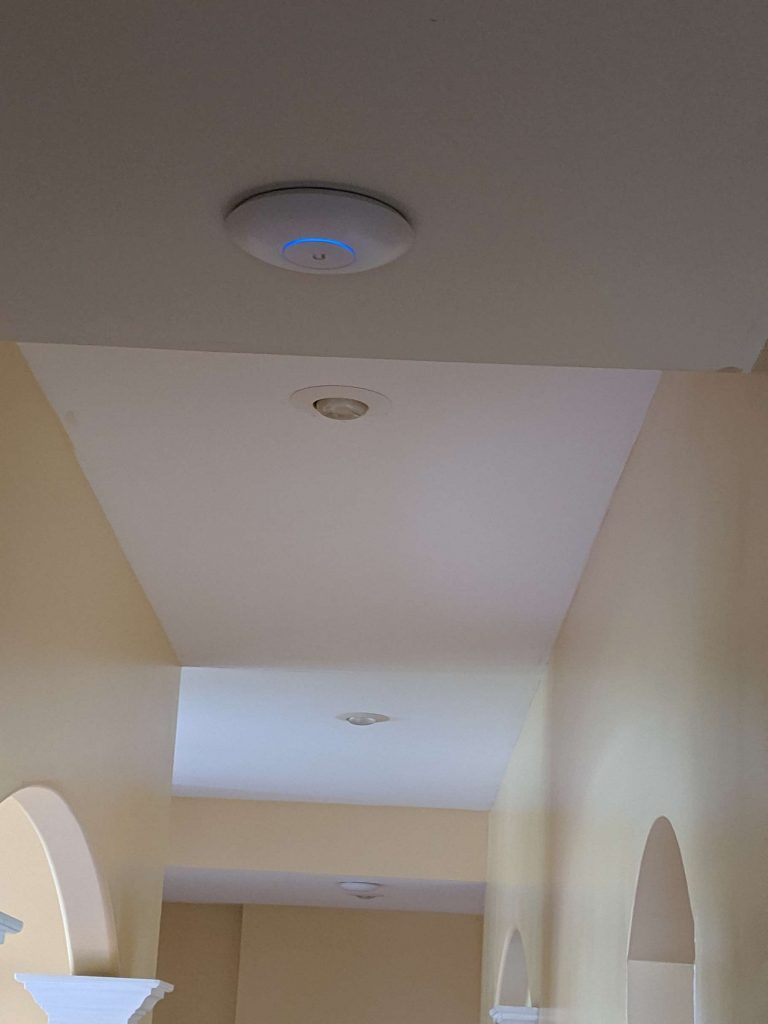
Both access points set up, wooo

This run was a 4-cable run. 2 went to the attic, 2 to the office, which has the wall where I ran the cables up.

Nearing the end. 12 lines run. Now it’s just the living room left to do. Usual procedure, popped open the wall, used my 3 foot flex bit to make it easier. Fished this one with the help of my wife, who has been very patient with me through this whole thing and I appreciate the hell out of her for it.
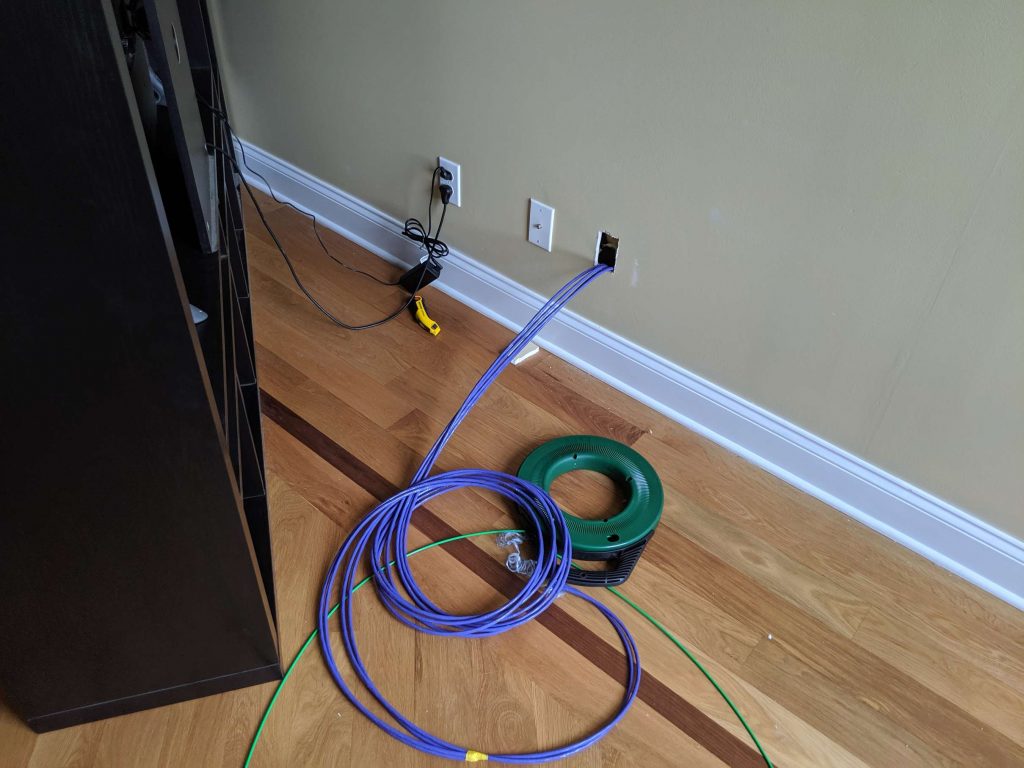
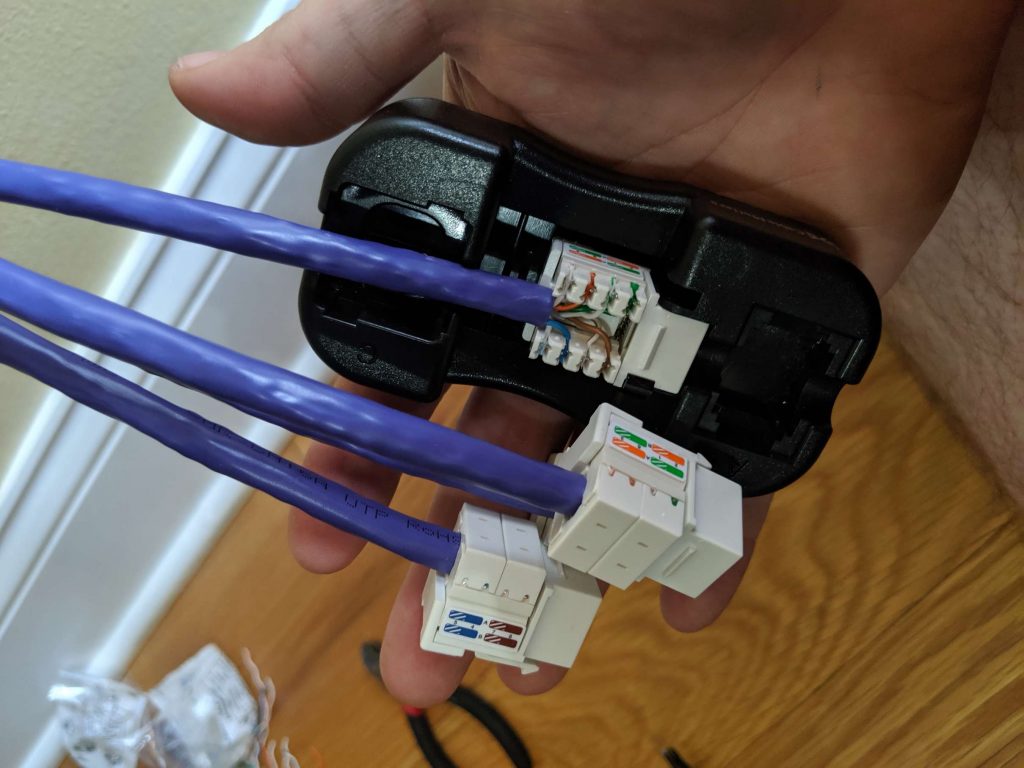
Always pull at least 10 feet more than you think you’ll need. Beats pulling it twice.

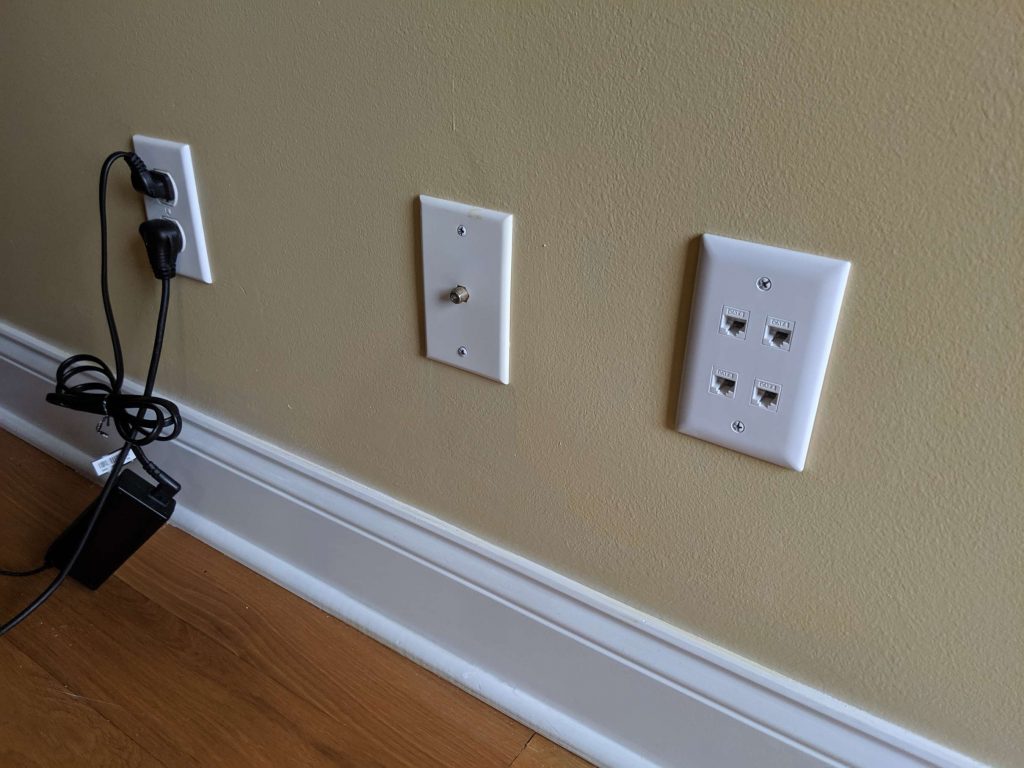
Easy peasy, doesn’t look half bad for an amateur.

The network cabinet is starting to look pretty solid here.
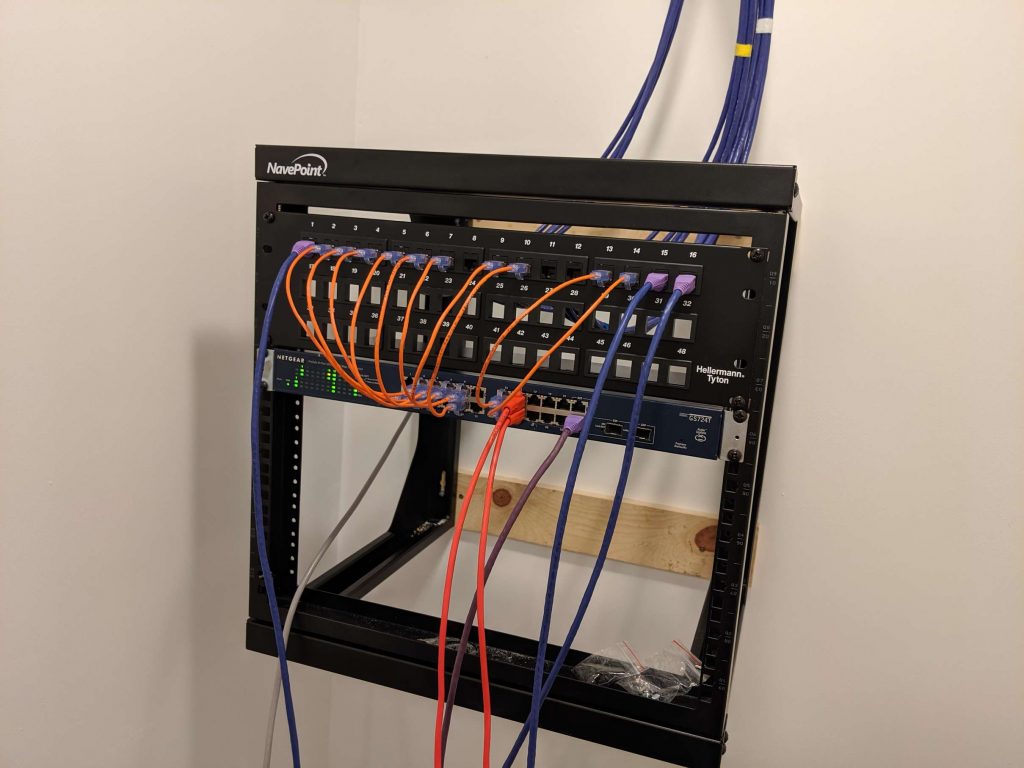
Monoprice Slimrun Cat6a. Heard good things so I gave them a shot. So far, absolutely impressed.

Then to wrap it all up I did some more cable management in the computer room, since the jacks are on the opposite side as the PC’s.
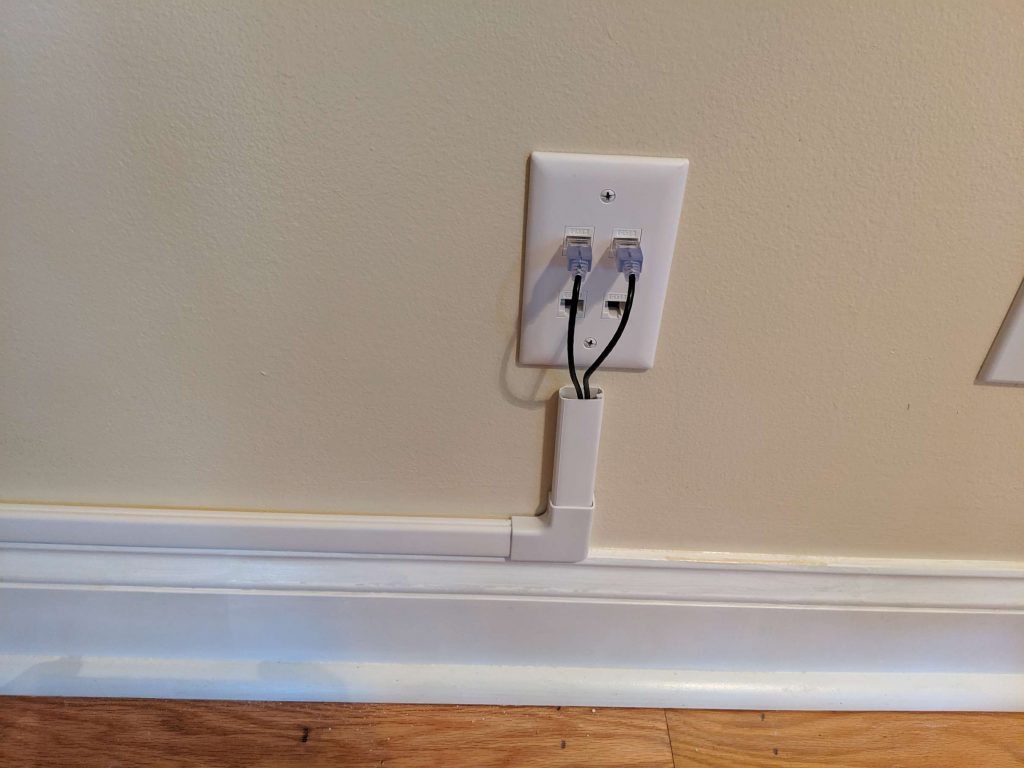
Now I’m sitting here at the end of my little 5-day project and feeling a lot more confident about doing the same thing in the basement. Shooting for sometime in October for the next expansion, which will put me in a good spot if we end up hosting our annual Thanksgiving lan party.

Next up: Couple Cisco fanless switches are on order and should be here in the next week. Those will take the place of my Netgear, which is slightly too loud for the room.
Onto Wifi

The wifi setup could have been simpler, but eh. It’s done and it works. I’m using pfsense as my main router and 2 (eventually 4) Unifi UAP-AC-Pro’s as my access points. I’m running the Unifi controller in a container on my colocated server in Chicago for accessibility purposes. It’s considered “home prod”.

In my previous post I described the network layout. Initially, I planned to have separate wifi networks for each of my tenants, plus a network for IoT/HA/cameras, plus a guest network, plus a “shared” house network for Chromecasts, et al. Turns out, though, you can only have 4 ssid’s per band per AP. Which is severely limiting, to say the least, if you want to double up 2.4 and 5.8 for each network.

So my options now are:

1. Scrap multiple networks, take the easy way out, and have everyone’s mobile devices/laptops/tablets on the same shared network, or

2. Set up RADIUS vlan assignment.

I went with option 2.

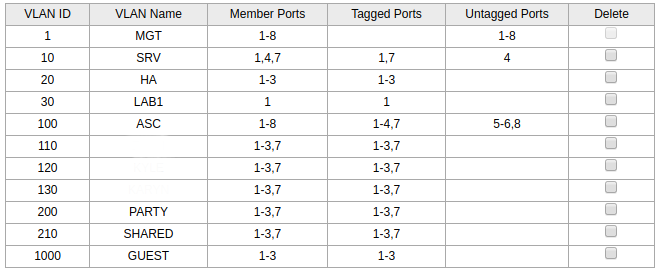
I already have the vlans set up on pfsense, I’ve got my cheapo TPLink TL-SG108E 8-port smart switch set up with my vlans, and I’ve got all my planned wifi-accessible networks tagged on the access point ports. I immediately lost connection to the AP’s when I made that change. Fuck.

So, I forgot that when you set up vlans, you need to set up a default tag to tag untagged frames with. Initially I had that set up as the “wife and I” network. I changed the default on those ports to the management/untagged network, vlan 1. The AP’s dropped, couldn’t get dhcp reassigned, and I had to manually reset them. Then I plugged them back into the management vlan ports and watched the dhcp leases. Success! They were assigned a 10.0.255.x ip, which meant they were on the management vlan. SSH in using the default creds, manually do set-inform, and they appear on the controller. Bam, wifi’d.

Next up, vlan troubleshooting on the switch. The interface is less than intuitive but the documentation isn’t bad. In the end I landed on this:

I have no idea what I’m doing

I’ve got the AP’s on ports 2 and 3 and the pfsense router on port 1, which is my trunk port. After some tweaking I finally got the vlans to work on ports 2 and 3. I really wish the PVID/default tag settings were on the same page in the interface.

I set up a docker image on my PC with RADIUS, a couple local config file mounts, and a port. Unifi wasn’t having it and I’m far too lazy to do a full implementation of RADIUS for my lab. So I did some googling and found out that you can just install RADIUS on pfsense. Score.

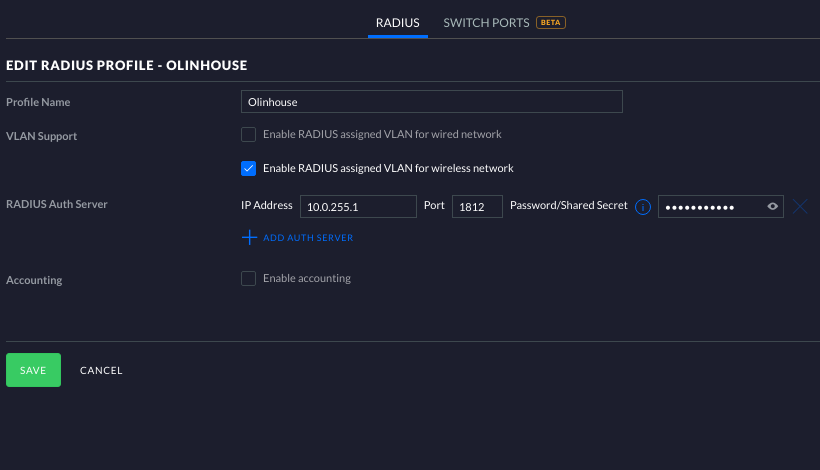
So I set up a profile in the Unifi controller. Not bad, just use the management network IP of the pfsense router as your auth server, port 1812, and tick “Enable RADIUS assigned VLAN for wireless network.”

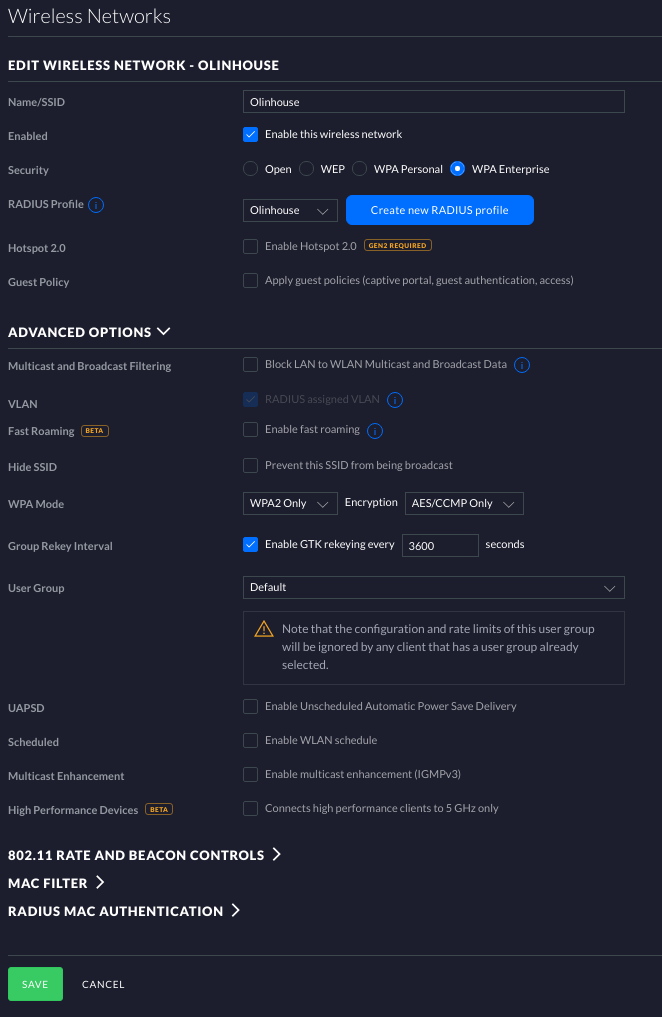
Now we need to set up the wireless network to take advantage of the RADIUS profile we just made. Click on Wireless Networks. Name your SSID, select “WPA Enterprise under security, and then select your RADIUS profile you just made. Under Advanced Options, make sure that RADIUS assigned VLAN is checked.

After that, I went over to pfsense and picked up the FreeRADIUS plugin. Easy enough, just downloads, installs and oh damn that’s a lot of tabs. Alright, RADIUS is pretty involved. But fortunately I’m only interested in a few parts of it.

For users, you just set up a username, password, and the vlan of the network you’d like them to use. That’s the least involved part of this process.

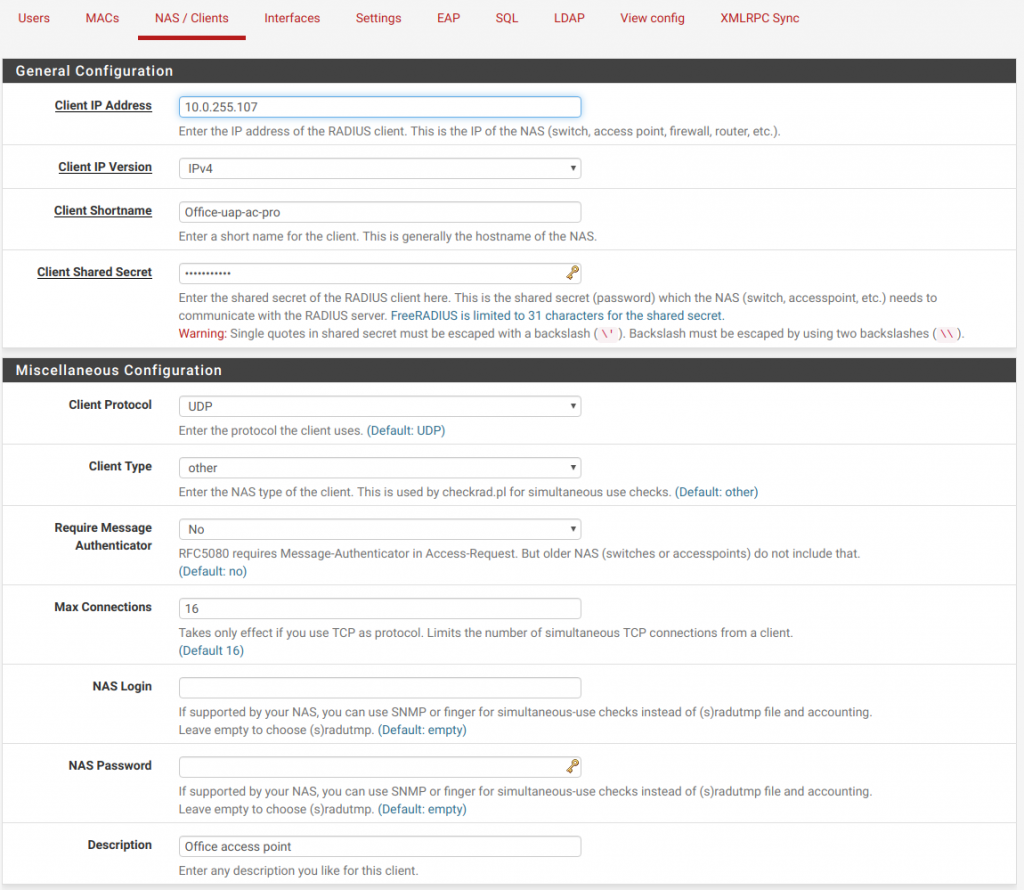
Next up, head over to NAS/Clients. You’ll need to grab the ip’s of your Unifi access points, because you can’t set up whole-ip-range permissions. You have to do it for each one, and honestly that’s probably for the best anyway. You can also take this opportunity to set static ip mappings for the AP’s. I didn’t because I’m moving this whole network in a month anyway.

Mostly defaults, just set the ip, name, and description. Do this for both AP’s

You’ll have to set up an interface for both auth and accounting. I don’t use accounting really, but it might be a nice feature down the line. Set port 1812 for auth and 1813 for acct.

You don’t need to touch anything under “Settings” for this setup.

Under EAP, set the following:

  • Under EAP-TTLS, set Use Tunneled Reply to Yes
  • Under EAP-PEAP, set Use Tunneled Reply to Yes
  • Under EAP-PEAP, set Default EAP Type to MSCHAPv2

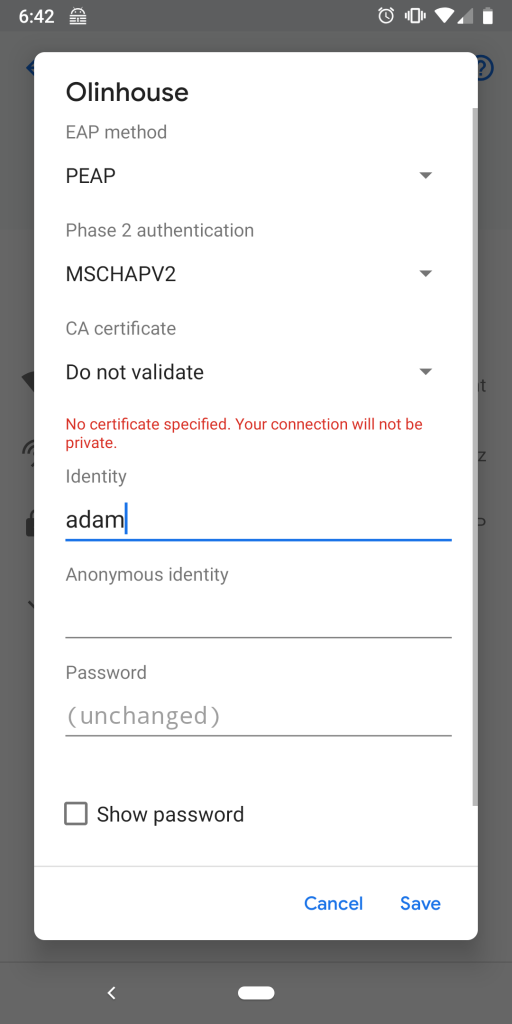
At this point, you should be able to log in using one of the users you made. It’s pretty straightforward to connect a phone to the network. Just make sure you use PEAP, pick MSCHAPv2 for Phase 2, and don’t validate the CA.

And just like that, you’re in. EZPZ.

Logical Network Setup

I’ve never really set up anything more complicated than a couple basic networks before. Couple times I’ve done multi-network datacenter builds with routing and acl’s between them, some multi-site networks with ipsec tunnels, and anything you can think of in AWS, I’ve pretty much done. But, I’ve never had a purpose built “enterprise” physical network to play with. So part of my current project is to dip my toes into that.

In the new house, I’m going to be renting out a couple rooms. Since there’s no sense running multiple Comcast lines to the house (pending a Metronet rollout to the area) I figured I’d build out one network for each of my 3 tenants, plus a separate network for my future wife and I. So, that’s 4 networks to start.

Next up, I’ve got my HomeProd network. Simple enough, that’s where most of my architecture will be. Couple k8s servers, NAS server, bastion, monitoring. Up to 5.

Almost forgot, management vlan. Gotta have somewhere to provision the access points from, control the hypervisors from, and put the PDU/switches/etc. That’s 6.

No network is complete without a guest wifi network, so, 7. All the chromecasts should be on the same network, and those are going to be shared with everyone separate from their personal networks. 8.

Plus a sandboxed, monitored network for IoT, and oh yeah, a couple sandboxes for labs, one with dhcp and one without. And while we’re at it, how about a dedicated lan for lan parties.

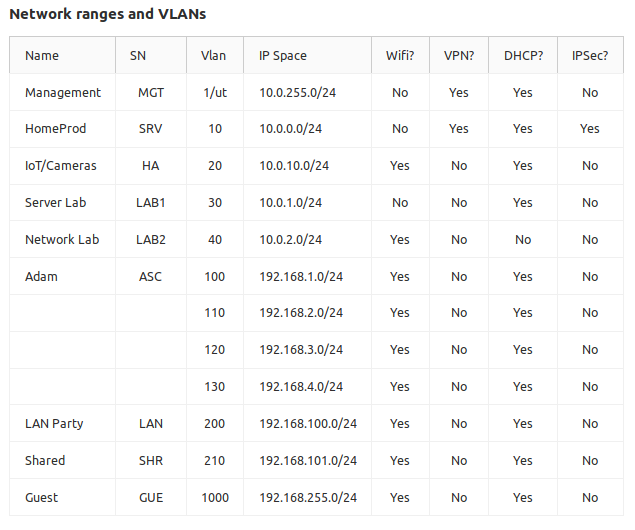
All in all, I’m at 12 distinct networks in my home. I think I’ve got the ip space all figured out:

No such thing as overkill if you’re having fun

Alright, cool. Bit much, but it’ll be pretty solid once it’s all in. So now it’s onto the wifi system design.

Hello world!

Fun new rack, fun new project. This blog is going to document my progress, challenges, solutions, and straight up stupidity as I build out my new home network.

My goal with my new homelab is to create an enterprise-grade system for managing workloads in kubernetes using a combination of new and used hardware for under $6000 all up. This has to include some home networking things, like my Plex system (with a kubernetes shim to launch k8s transcoder pods), zfs storage w/ some seriously beefy caching, full monitoring stack using Prometheus and Grafana, and a Steam Cache.

Basically, project structure is going to go as follows:

  1. Relaxation time. As of this post, getting married in a week (and a day), month and a half into a new job, and buying a house in a month and a half. Right now, I’m booked solid.
  2. After all the major wedding stuff is out of the way, I’ll be moving onto planning. I’ve already got 10 networks planned for the new house. Couple of friends and fiancee’s sister are going to be renting rooms from us, and I’d like them to have their very own networks. Add in management, homeProd, my network, IoT sandbox, and the labs, and boom, 10 networks.
    Most of what I need to plan out is the server architecture, dns structure, kubernetes, physical alterations to the house, cooling, etc. I’ll dig into the details in a later post.
  3. Installation. I need to get some cables run, and I need a 240 line to the server room. There’s a perfect little spot in the basement far away from any water lines that would make a perfect place to put my gear. Only problem is, there’s zero power in the room, zero ventilation, and zero data lines. But I have the good fortune to have seen the basement before it had drywall, so I know roughly where everything is and I’ve got a good idea of how I’d like to run cables.
  4. Initial config. Pull out my existing managed switches, set them up with vlans, start configuring pfsense, get wifi all squared away, and set up the ipsec tunnel to my datacenter in Chicago.
  5. Buy the big shit. Going to be picking up a new 32u rack, couple R620’s, a new set of Easystore’s to shuck, do a whitebox build for my new storage array, and pick up some surplus 10/40gig gear. This is gonna hurt my wallet.
  6. Full Monty. While trying to keep my existing network online since I work from home, try to build out the new infra, get it all configured, and build out some automated management so I don’t have to babysit it.

This is going to be a fun ride. Stay tuned.